“If you don’t have time to do it right, when will you have time to do it over?” – John Wooden
Making sure you install your plastic mulch edging right the first time is a sure way to save time and prevent inconveniences. Follow the guide below to make sure you don’t run in to future problems
Table of Contents
Guide on correctly setting up your plastic mulch edging
This guide is about setting up edging that is able to be put in the ground with stakes. Check out an example of a plastic edging with anchoring spikes you can put in the ground here.
Step 1: Choose and measure an edge
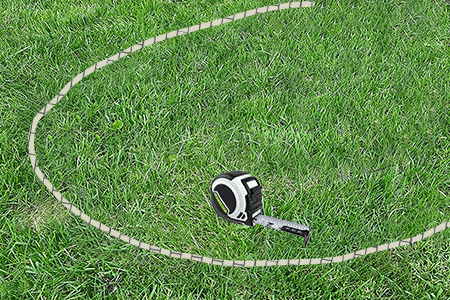
Find the areas of your outdoor space you want to edge. Avoid downspouts, rocky soil and surfaces that aren’t relatively flat.
Take a tape measure or a long piece of string to measure and lay it along the edge. From here, cut, mark or take a note on the length of the string or tape measure to find out how much edging you need.
At this step, also consider the depth of the bed. Depending on the depth of mulch and topography, take this into consideration when finding your edging on the next step
Step 2: Buy appropriate edging
If the mulch you are using is particularly heavy. For example stones. Or if the depth of the mulch you want to add in is over 6 inches, consider buying a more sturdy mulch edging.
This can be:
- Concrete slabs
- Wooden panels
- Reinforced plastic edging
- Stones
General plastic mulch edging is fine for most separations of sections in your garden but for edges that will be required to hold back a lot more weight, consider a different edging idea. The step by step guide in this example uses plastic edging but the set up will be very similar
Step 3: Arrange the edge into place temporarily

Before you permanently hammer your edging of choice along your planned out line, place it where you expect it should go and hammer it in lightly
This will ensure you can adjust your edge if you find out you have too much or too little mulch
Also, hammering the edging in lightly will ensure the edging will be slightly taller than the final placement allowing you to move around and work on the area with ease as mulch will be less likely to spill over in to each section.
Step 4: Add the mulch on the outside

This will be the mulch that is on the surface that has a lower height or on the opposite side of the stake your hammer in to the ground if you are using a plastic mulch edging kit.
Layer the mulch or soil evenly and pat it down lightly
Step 5: Hammer in the mulch edging permanently
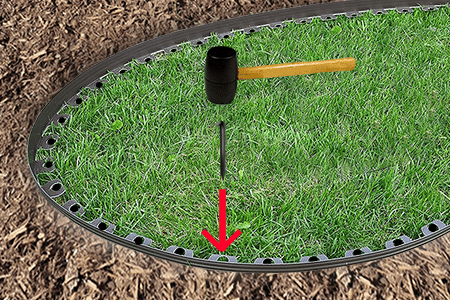
Besides placing your mulch in the right place, this is probably the second most important step.
Using a rubber mallet or an appropriate tool, hammer the stakes for the plastic edging, stones, concrete slabs or wooden blocks as deep in to the soil as you can.
Try not to compromise the required height of the edging with how you deep you hammer in your stakes.
A safe number for how deep you should drive them in to the soil is for every three inches you have above ground, drive it two inches below ground.
For example, a wooden panel used for mulch edging that is 10 inches long will have 6 inches above ground and four underneath.
This is so you keep your mulch contained and the edging isn’t easily moved.
Overtime, the mulch edging will naturally change position slightly due to water movement and organisms in the soil.
However, following these steps this movement should never be enough for the edging to wash away and you have to redo it.
Step 6: Add in the inside mulch
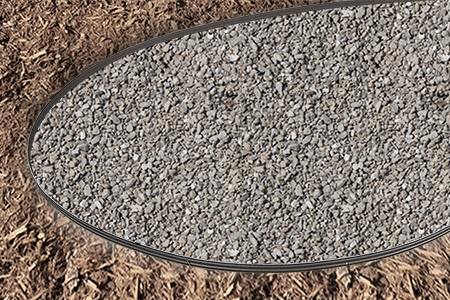
Fill up the remaining sections of the mulch and pat it down so no excess mulch spills over from one section to another.
Now have your final design!
Checklist on installing mulch edging without it washing away
- Correct edging type
- Deep enough stakes
- Avoid downspouts
- Compacting soil beforehand
- Check soil for gravel or stones
- Too much heavy mulch
Do you need edging for mulch?
No, the functions of mulch are still the same whether you use edging for mulch or not.
Mulch is used to protect the soil from drying out, producing too many weeds and to improve soil quality.
However, it is useful to separate borders where there are different types and colours going on to maintain order and keep things pleasing to the eye. This will help create a neat, pretty finish to your outdoor space and prevent mulch being in unwanted areas due to wind, rain or the movement of people and pets.
For more reading on setting up your mulch edging in general. Read our guide on preventing edging from washing away also.